Ubuntu 20.04 에서 Pytorch, OpenAI Gym설치
개요
OS : Ubuntu 20.04
Graphic Driver : Nvidia 455.38
CUDA : 11.0
Pytorch : 1.7.1
호환성 체크를 잘 하고 버젼 결정을 하자.
나는 우선, Ubuntu 20.04 에서 설치 가능한 CUDA를 먼저 보았다. CUDA 11.0, 11.1, 11.2 모두 Ubuntu 20.04 지원을 했다.
그런데, 그 중에서 현재 최신 stable한 graphic driver인 455를 지원하면서 Pytorch 1.7.1이 지원되는 CUDA 는 11.0이 유일했으므로 CUDA 11.0을 설치하기로 결정하였다.
1. Graphic Driver 설치
1) 메뉴 -> software & update -> additional drivers 탭 -> NVIDIA graphic driver 선택 후 apply changes
2) 설치 확인 (다음 명령어 쳐서 잘 설치 되어있는지 확인하자)
nvidia-smi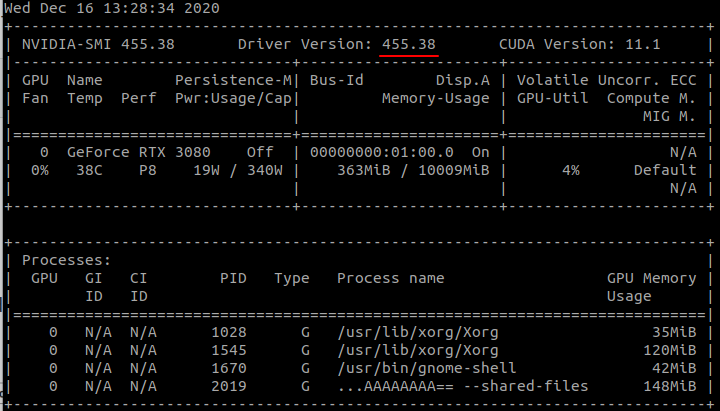
2. CUDA 설치
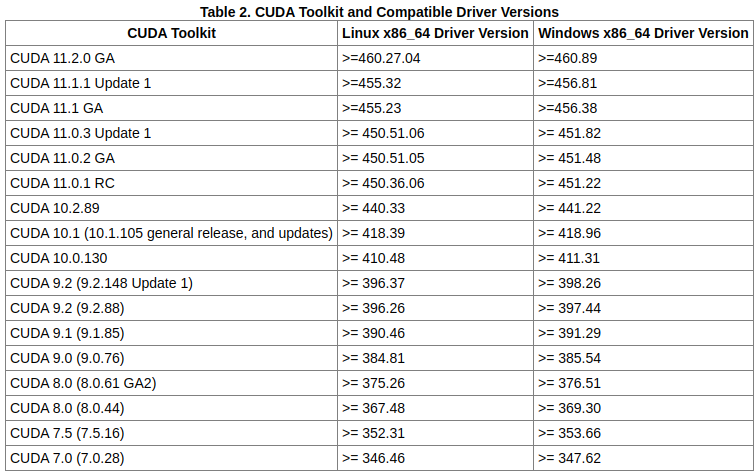
아래 사이트의 표를 보고, 현재 설치되어 있는 graphic driver 버젼 (nvidia-smi 명령어로 체크 가능)과 호환되는 CUDA 버젼을 잘 체크하고 설치하자.
docs.nvidia.com/cuda/cuda-toolkit-release-notes/index.html
Release Notes :: CUDA Toolkit Documentation
The Release Notes for the CUDA Toolkit.
docs.nvidia.com
CUDA 설치는 아래 사이트에서 할 수 있다.
CUDA Toolkit 11.0 Download
Select Target Platform Click on the green buttons that describe your target platform. Only supported platforms will be shown. By downloading and using the software, you agree to fully comply with the terms and conditions of the CUDA EULA. Operating System
developer.nvidia.com
위 사이트에서 아래 사진과 같이 선택 후 Installation instruction 따라하자. runfil(local)이 가장 간단해보여서 선택하였다.
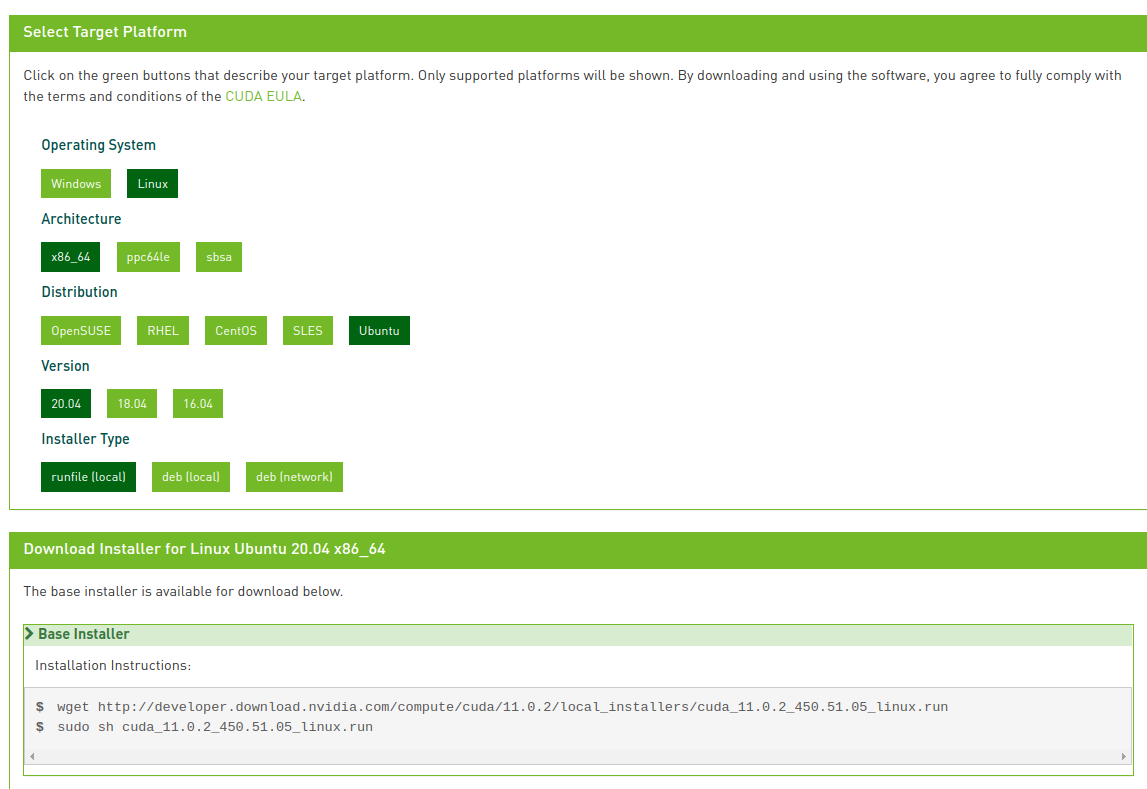
wget http://developer.download.nvidia.com/compute/cuda/11.0.2/local_installers/cuda_11.0.2_450.51.05_linux.run
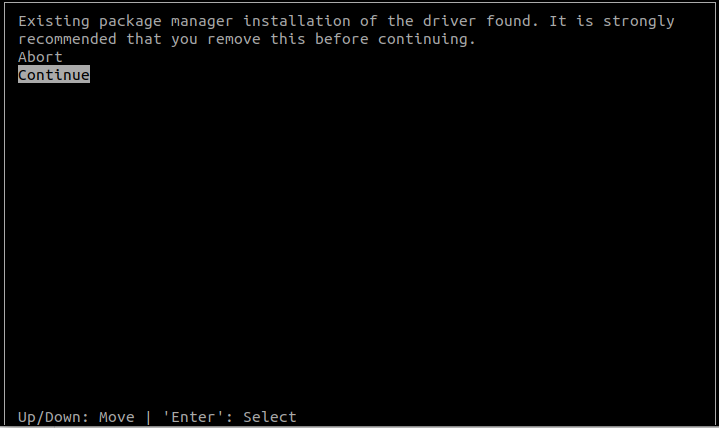
sudo sh cuda_11.0.2_450.51.05_linux.run이제 설치 하는 과정 중 아래와 같은 화면들을 볼 수 있을 것이다. Graphic driver는 이미 설치되어 있으므로 "continue"에서 엔터를 누르자. 만약 graphic driver 버젼이 안 맞는 다면, 맞는 버젼으로 설치 후 다시 진행바란다.
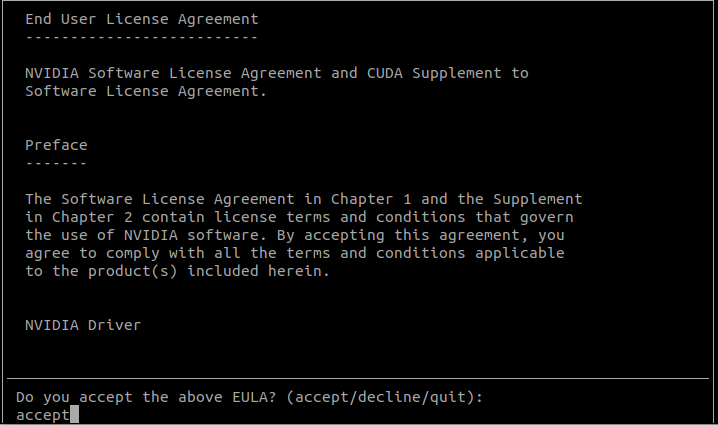
License 조약인데 그냥 accept를 입력하고 진행하자.
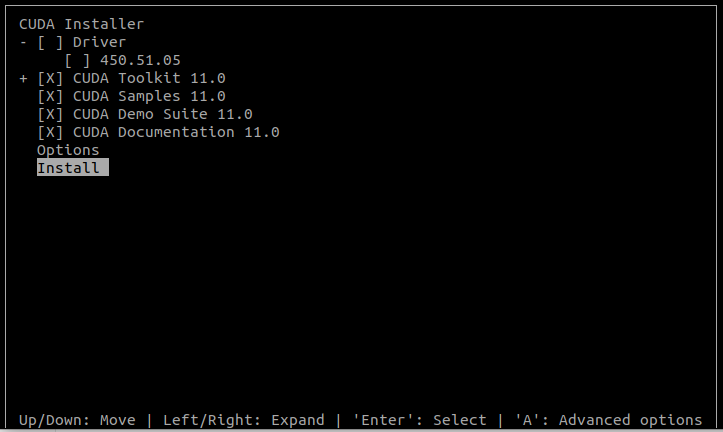
Driver는 따로 설치를 하지 않을 것이므로 Driver에서 space bar를 눌러 해제 후 install 진행.
설치가 완료 되면 아래와 같은 화면을 볼 수 있다.
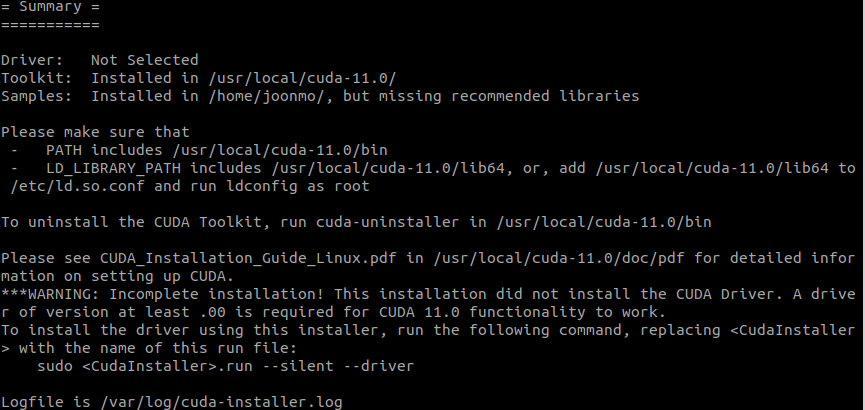
그 다음으로 CUDA 환경 변수 설정을 하자.
우선, ~/.bashrc에 다음을 입력한다. 여기서 LD_LIBRARY_PATH의 경우 뒤에 ${LD_LIBRARY_PATH:+:$LD_LIBRARY_PATH} 이런 식으로 입력하는 이유는, 보통 Ubuntu를 처음 설치한 경우, LD_LIBRARY_PATH가 비어 있는 경우가 많으므로, 비어있을 경우 새로 입력을 하고, 비어 있지 않은 경우 새로운 값을 앞에다가 추가하기 위해서 이렇게 입력한다.
$PATH 의 경우 그냥 단순하게 추가하는 이유는 $PATH 는 기본으로 이미 여러 환경변수 값들이 입력이 되어 있기 때문이다.
export PATH=/usr/local/cuda/bin:$PATH
export LD_LIBRARY_PATH=/usr/local/cuda/lib64${LD_LIBRARY_PATH:+:$LD_LIBRARY_PATH}
3. Pytorch 설치
아래 사이트에서 자신에게 맞는 버젼을 선택 후 설치 진행하자. 나는 pip로 설치를 선택하였다.
pytorch.org/get-started/locally/#linux-pip
PyTorch
An open source deep learning platform that provides a seamless path from research prototyping to production deployment.
pytorch.org
아래와 같이 선택 후 설치를 진행하자. 만약 pip3를 사용한다면, "Run this Command:"의 pip install ~~~ 대신 pip3 install ~~~ 로 바꿔서 명령어를 실행한다.
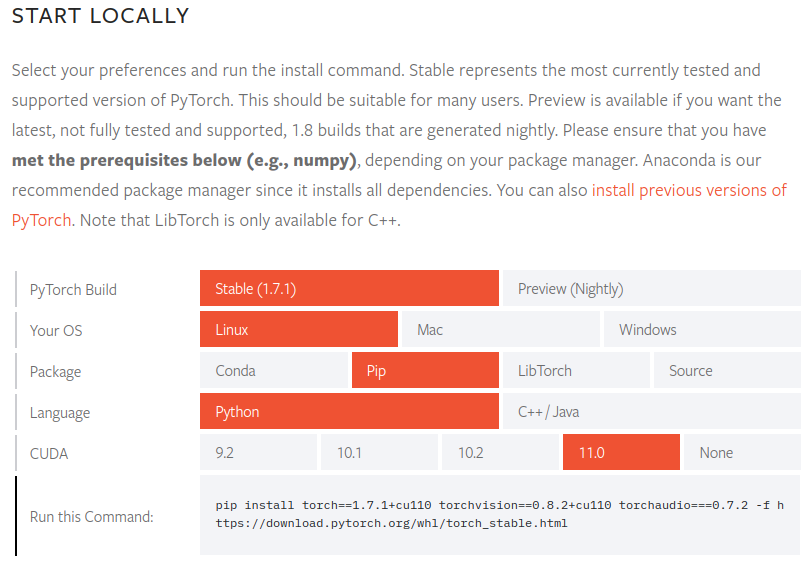
pip3 install torch==1.7.1+cu110 torchvision==0.8.2+cu110 torchaudio===0.7.2 -f https://download.pytorch.org/whl/torch_stable.html4. Pytorch Check
아래와 같이 python3 실행 후, pytorch가 설치가 잘 되어있는지 확인해보자. Print 가 잘 되면, 성공한 것이다.
import torch
x = torch.rand(5, 3)
print(x)
그리고, Pytorch에 CUDA 연동이 잘 되어있는지 확인해보자. True가 뜨면 성공!
import torch
torch.cuda.is_available()
torch.version.cuda
torch.cuda.get_device_name(0)
5. OpenAI Gym 설치 및 Check
우선 Gym 을 설치하자.
pip3 install gym다음 예제 코드로 잘 설치 되었는지 테스트 해보자.
import gym
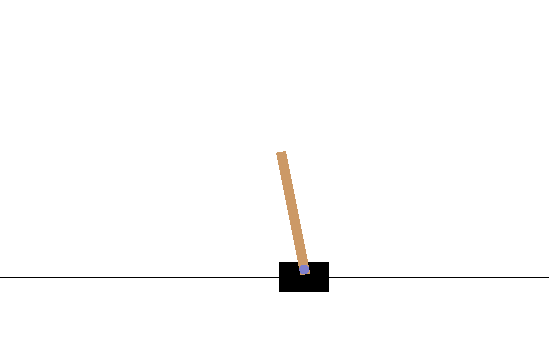
env = gym.make('CartPole-v0')
for i_episode in range(20):
observation = env.reset()
for t in range(100):
env.render()
print(observation)
action = env.action_space.sample()
observation, reward, done, info = env.step(action)
if done:
print("Episode finished after {} timesteps".format(t+1))
break
env.close()나도 아직 무슨 코드인지는 잘 모르겠지만, 대략 아래와 같은 시뮬레이션이 뜨면 Gym까지 설치 완료! 이제 슬슬 Gym을 활용해서 RL 예제 코드들을 짜봐야겠다.